Questions:
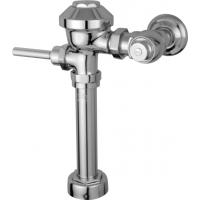
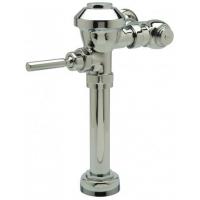
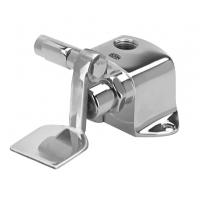
Posted on Friday, April 28, 2017 on product Zurn PEMS6000-HYM-IS Side-Mounted Solenoid Actuator
-
0voteA: We recommend changing out your hardwired actuator with the ZERK-CPM E-Z Battery Powered Retrofit Kit (Part #100149). You will be able to keep the same valve body and switch out the existing hardwired actuator with the new battery operated actuator. This will ensure that you can still flush your fixtures if there is a power outage. If you have any other questions our experts are here to help! Call or text 800-518-5388Posted by Kully Supply on Friday, April 28, 2017
Posted on Monday, March 27, 2017 on product Zurn PEMS6000-HYM-IS Side-Mounted Solenoid Actuator
-
0voteA: It may be that you are not getting enough power to the valves causing them to malfunction. This Zurn PEMS6000-HYM-IS Side-Mounted Solenoid Actuator (Part #100480) requires 7.4 VDC to function properly. Zurn Power Converters can accomodate up to 8 Flush Valves. We suggest adding the appropriate amount of Power Converters. If you have any other questions our experts are here to help! Call or text 800-518-5388Posted by Kully Supply on Monday, March 27, 2017
Posted on Monday, February 3, 2014 on product Zurn PEMS6000-HYM-IS Side-Mounted Solenoid Actuator
-
0voteA: CALIBRATION INSTRUCTIONS FOR ZEMS-IS 1. Obtain a target. SEE FIGURE 12. 2. PRESS and HOLD button for 10 seconds * until the LED turns solid. (*Unit will blink and flush once while button is being held) 3. RELEASE finger when LED turns solid. Unit is calibrating. 4. Set target at desired distance, (No less than 16") from sensor face and verify NO other objects are in view of sensor face. 5. Keep target steady until the calibration cycle ends with two fast blinks. 6. For closet installations continue to "VERIFY CALIBRATION FOR CLOSET INSTALLATIONS". CALIBRATION INSTRUCTIONS FOR ZEMS-IS III 1. Obtain a target. SEE FIGURE 12. 2. PRESS and HOLD button for 10 seconds * until the LED turns solid. (*Unit will blink four times and flush once while button is being held) 3. RELEASE finger after LED turns solid. 4. PRESS and HOLD button when LED starts blinking. 5. RELEASE finger when LED turns solid. 6. Set target at desired distance, (No less than 16") from sensor face and verify NO other objects are in view of sensor face. 7. Keep target steady - Unit will blink while calibrating. 8. After 15 seconds, calibration ends with a fast double blink or a solid LED for 5 seconds. 9. IF THE LED REMAINS SOLID FOR 5 SECONDS AFTER CALIBRATION, the calibration was NOT successful. REPEAT STEPS 2-8 10. For closet installations continue to "VERIFY CALIBRATION FOR CLOSET INSTALLATIONS"Posted by Kully Supply on Monday, February 3, 2014
